

Hello Everyone!
During the discussions with the Zemax staff, we came across something that might be useful for everyone. This has to do with working in Python with the ZOS-API. As it is generally known, Python does not have IntelliSense in the same sense as Matlab does. The standard workaround (https://my.zemax.com/en-US/Knowledge-Base/kb-article/?ka=KA-01620 ) has been inserting break points and debugging your code to see the functions and the properties.
Below is a different way that can enhance the working speed in Python. However, I should note the following. At the moment of writing this, the method works only with Python 3.8 (Tested on Python 3.8.1). The precise reason for why it doesn’t work in, say 3.7, is not clear to me, but maybe Zemax staff can provide some feedback on this? Anyway, in order to get the method to work, I required the following.
- As an IDE - the Visual Studio Code from Microsoft: https://code.visualstudio.com/ .
- Tutorial on getting started with Python in VSCode can be found here: https://code.visualstudio.com/docs/python/python-tutorial . As a Python Language Server I use Pylance, but Jedi (the default) works as well.
- Once the Python extension is up and running with all the packages installed, it is necessary to install the so-called Interactive Python (IPython). Interactive Python, as the name implies, launches an interactive session of Python - an IPython kernel on a (local) server. This makes the Python a lot like Matlab™, in the sense that you can make “cells” out of your code and access variables/commands in the IPython terminal. You can go even further and use the so-called Jupyter Notebooks, which function solely via IPython. A tutorial on working with IPython and Jupyter can be found here: https://code.visualstudio.com/docs/python/jupyter-support-py
By running the ZOSAPI Code in the IPython session and/or in Jupyter notebooks, it is possible to get IntelliSense to a large degree. In order to demonstrate this, I am including a zip file with 2 files. In these, I have slightly modified the ZOSAPI class. First of all, now one has a single class which has a “connect” method, where one can use either the ‘Standalone’ or ‘Interactive’ options for the corresponding connections. This, in my opinion, simplifies the overall connection to Opticstudio. Second, in order for IntelliSense to work, it was necessary to specify the classes of “TheConnection”, “TheApplication”, and “TheSystem” explicitly. This is done in “__init__()” for ”TheConnection” and in “connect()” for “TheApplication” and “TheSystem”. For standalone mode it looks as follows:
The 2 files included are:
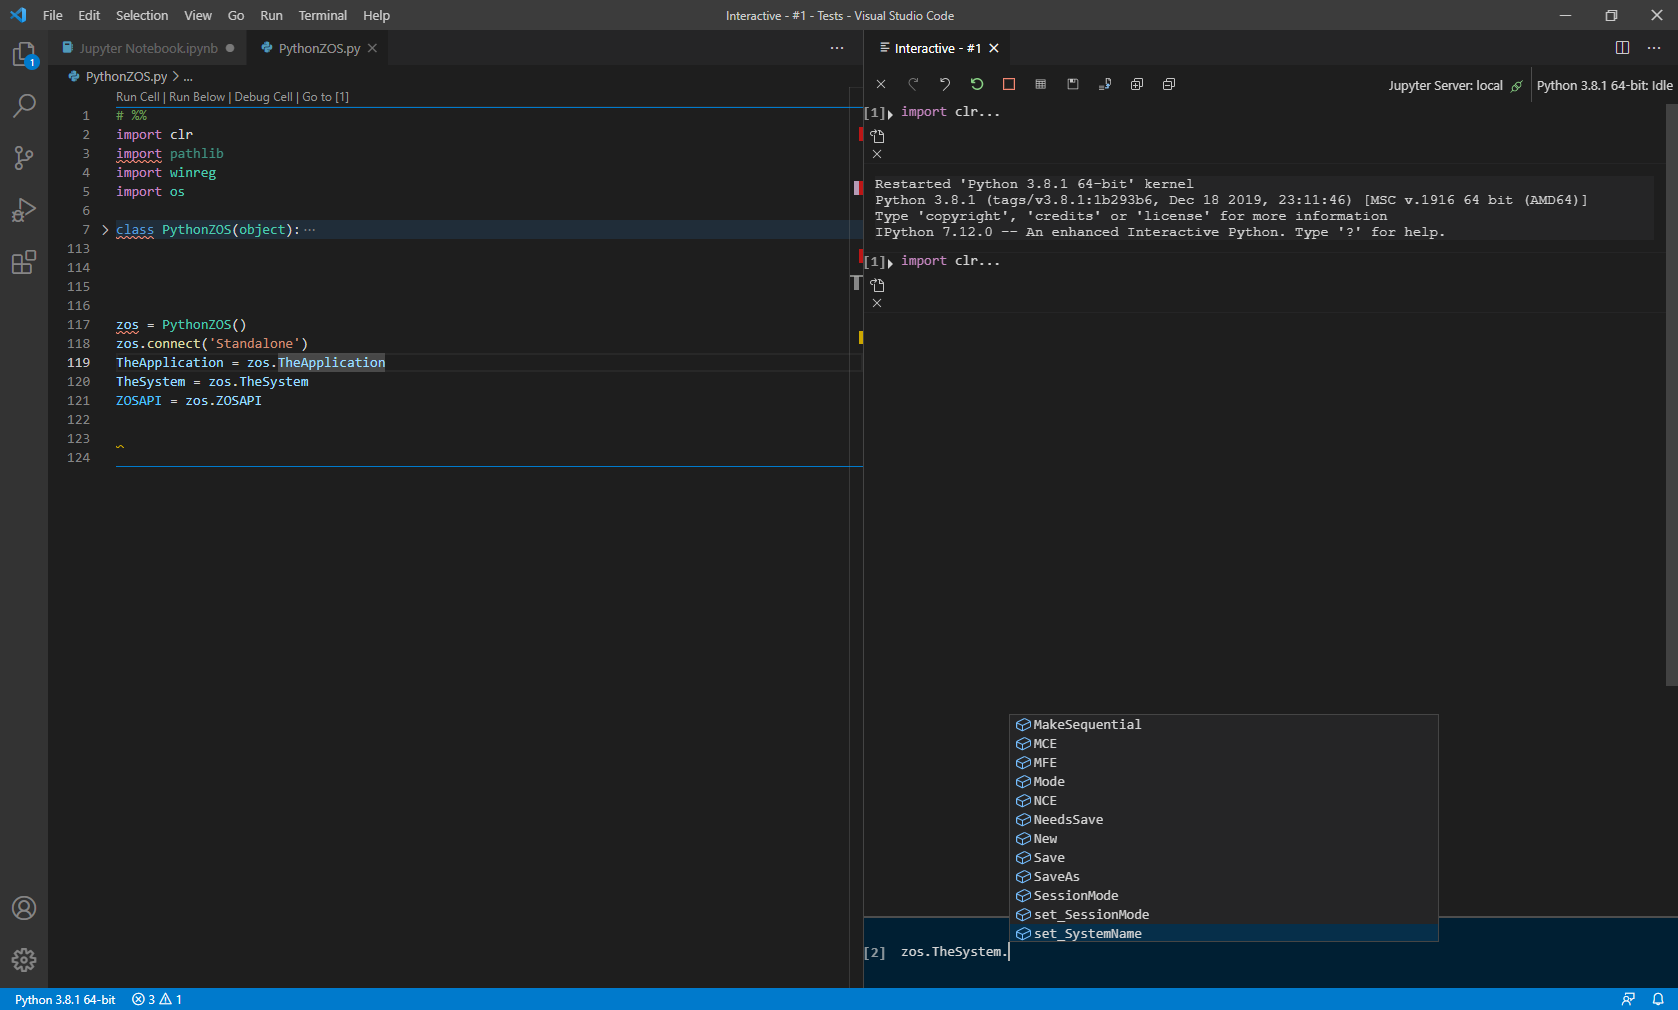
- PythonZOS.py. This file is rather straightforward. Note the “# %%” at the top. This tells the IDE that this is an IPython cell and needs to be executed as such. After running the cell, you are connected to OpticStudio in a standalone mode. If you then type in commands in the IPython window, you will notice that you have IntelliSense (this might take 4-5 seconds to kick-in. I guess IPython is loading everything in the meantime). Please note that you won’t have the IntelliSense in the main window of the IDE, since it is not running in IPython.
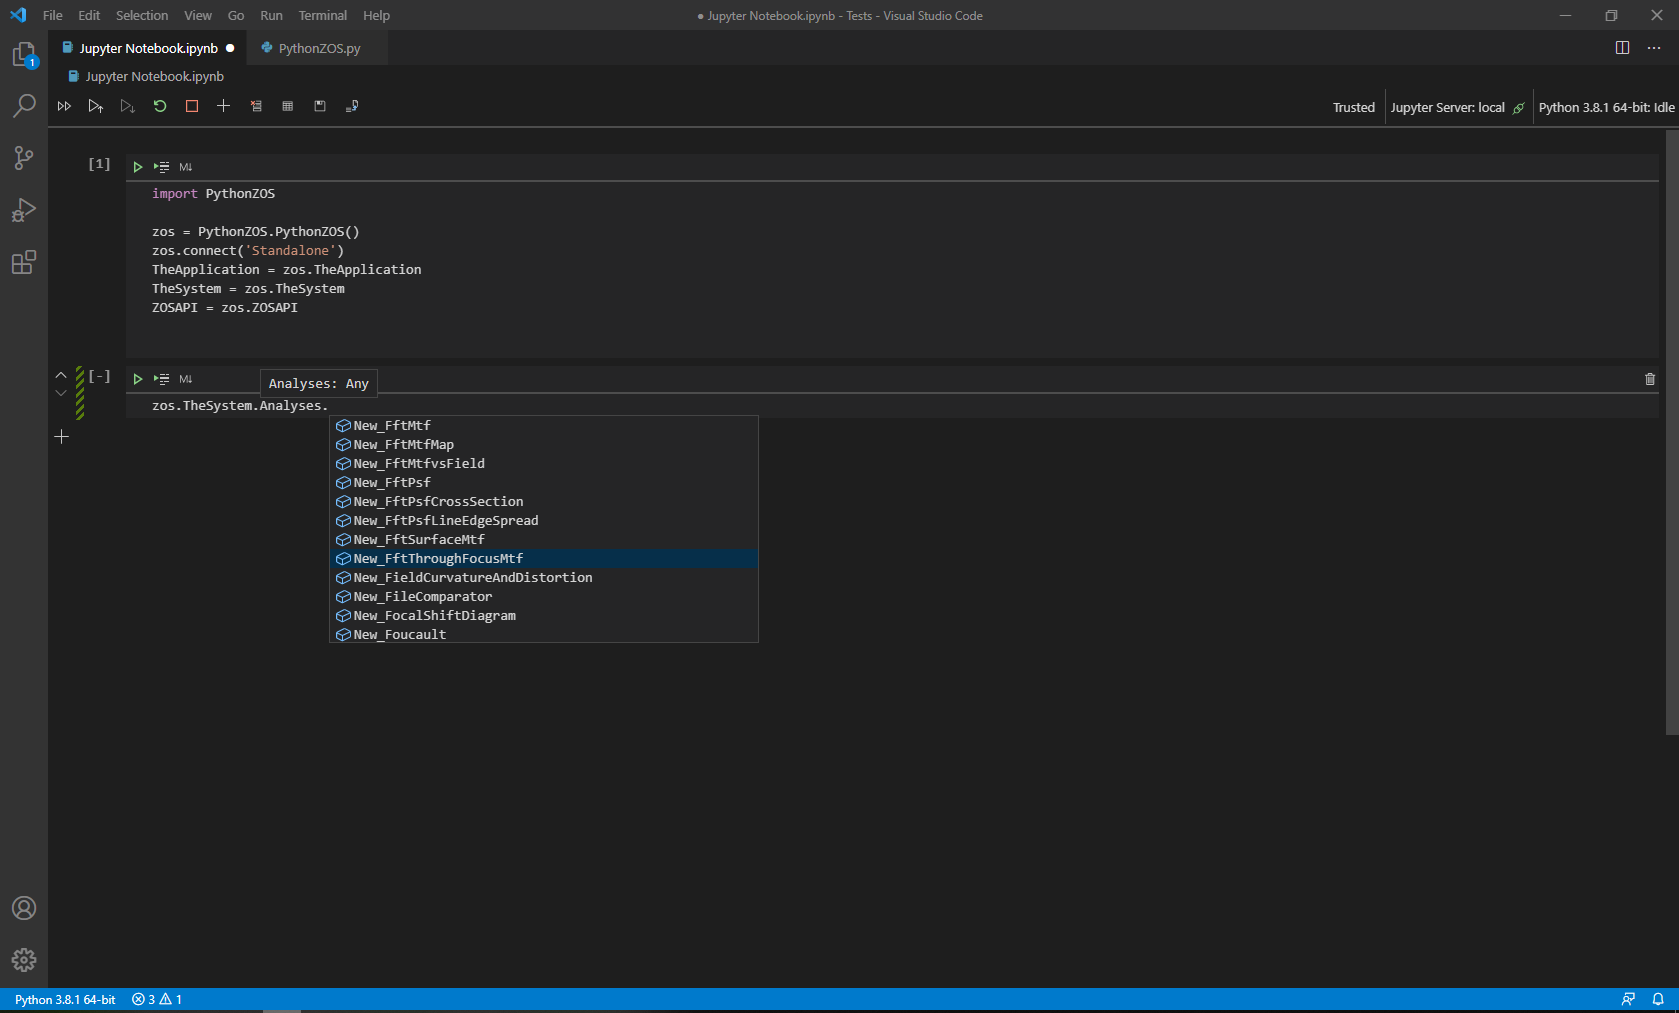
- “Jupyter Notebook.ipynb” is to show how IntelliSense works in a Jupyter notebook. Since the Jupyter Notebook runs fully in IPython, this means that you always get the IntelliSense. You need to execute the first cell, after which the connection is established and in the second cell you can start writing your ZOS-API code. The Jupyter Notebook has also the advantage that it allows you to run code line by line, making debugging easier (run by line is next to the regular run button).
In total, the mentioned method allows to get IntelliSense in Python 3.8. Sometimes it doesn’t work – it will not work if you are invoking a method which gets you a class instance – for example if you make a GetSurfaceAt(), then the properties of the created instance will not be in the IntelliSense. In these cases I use simply internal python command “dir()” to get all the class methods and attributes.
In conclusion, there are three points I would like to mention, especially for the Zemax staff.
- It should be somehow possible to also make the IntelliSense to work with the other ZOS-API classes. I am not sure how this can be easily implemented.
- After researching a bit, I have found that there is the so-called method of making “stubs”. These contain the class and method description, allowing Python Language Servers to use IntelliSense for your custom classes. I tried generating them, but it failed. More on this can be found in: https://github.com/gtalarico/ironpython-stubs
- I also came across a project of PyZOS, which wanted to extend the functionality of ZOS-API. https://pypi.org/project/PyZOS/ . If you look at some of the examples, it is pretty interesting. He managed to, for example, have a “true interactive” mode, where you can still work in OpticStudio normally but can send commands via Interactive Python, updating the GUI and the system. The last update to the project was in 2016, so I suppose a lot has changed since then. I haven’t yet had a chance to try to see how all of this was done.
Hope this has been helpful.
Best,
Mikayel

