Solved

Problem about Detector Rectangle pixelization


Nicola Nicassio

Hi, I have some doubt about the results obtained including the pixelization. Probably the problem is really trivial, but I really can’t get it.

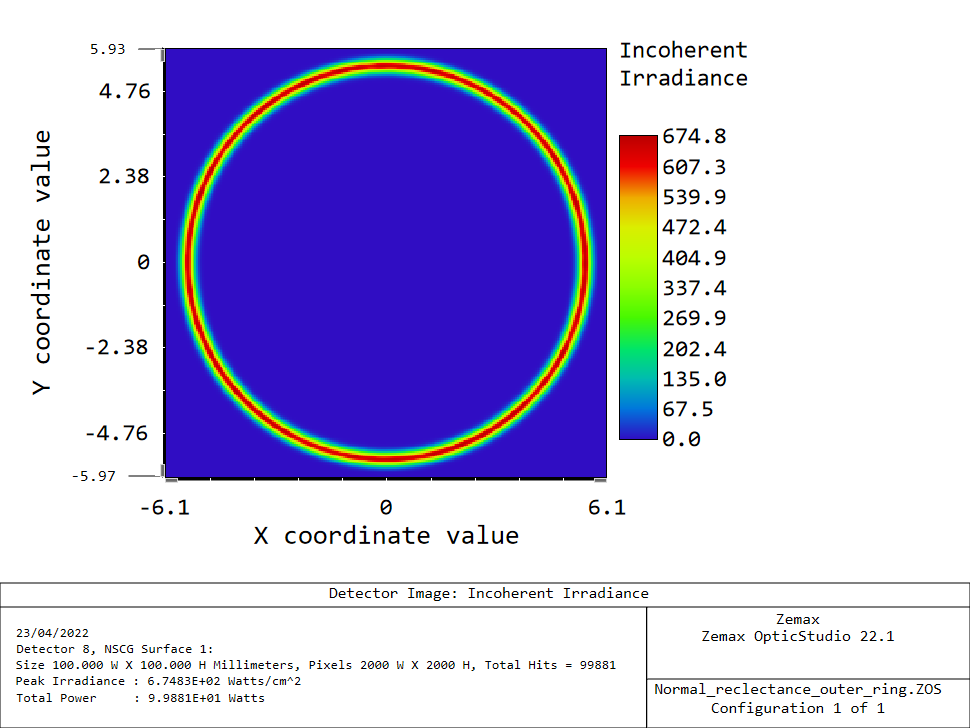
I have a Rource Radial emitting on the surface of a cone. In the ideal case rays are expected to ptocude a ring with raidus of about 5.8 mm. 

This is exactly what I see if the pixelization is set to 2000*2000 (corresponding to 0.05 mm x 0.05 mm). 

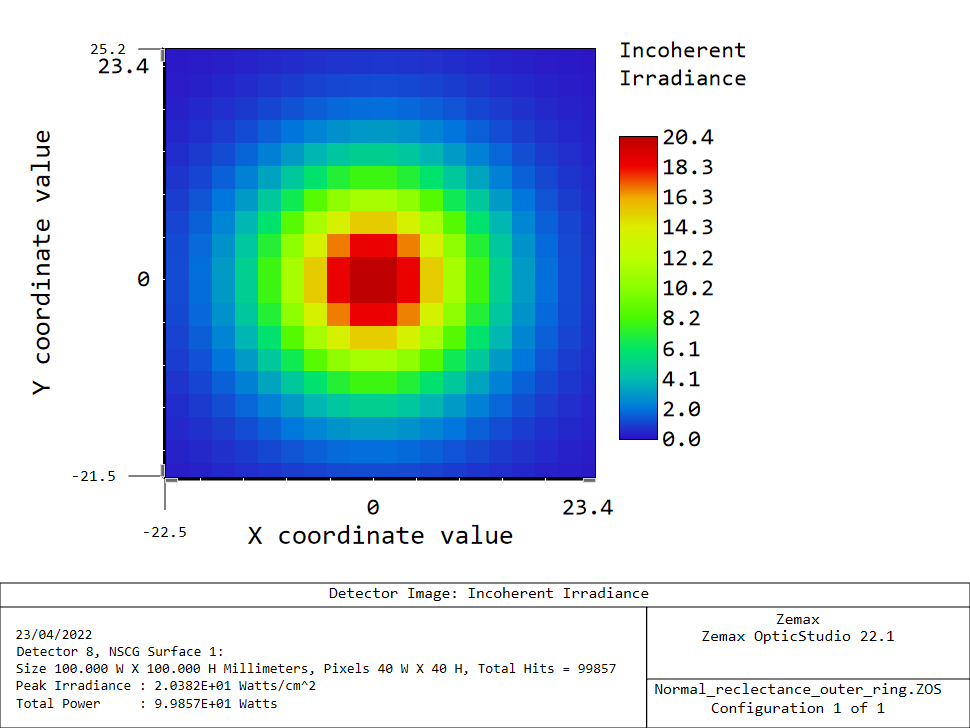
However is the pixelization is 40 x 40 (corresponding to 2.5 mm x 2.5 mm) I see a blow with maximum intensity for the central pixel (which I would expect ot be empty in the ideal case). 

Why does this effect happen? Am I missing something important about the way Zemax treats the considered number of pixels?

In particular what I really don’t understand is why there is so much spread as if the radius was different for the generated rays. 

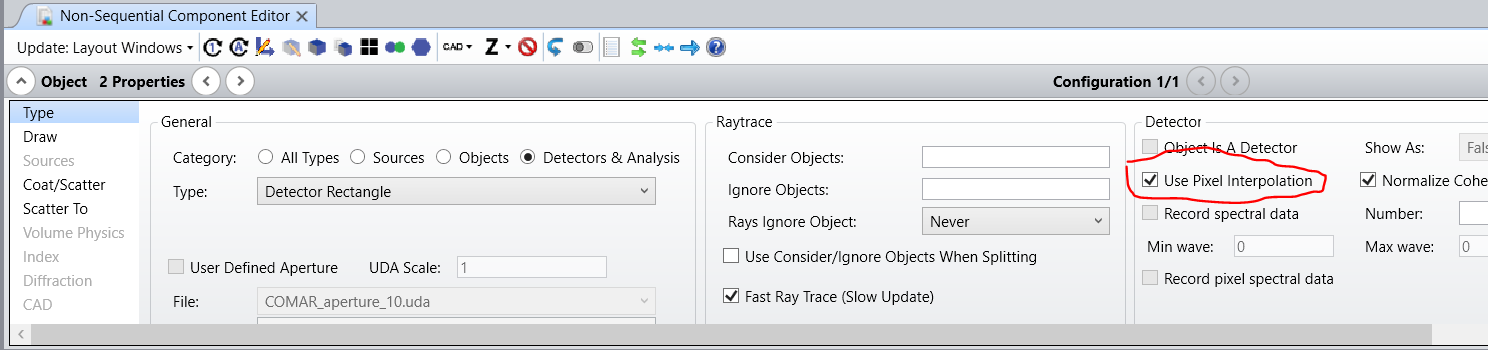
If there is some effect I’m currently neglecting, is there a way to just make sure that only pixels that are hit can respond? 


2000 x 2000 pixels
 
40 x 40 pixels


Best answer by David

Hi Nicola,

In the Object Properties for the Detector Rectangle there is a check box labeled ‘Use Pixel Interpolation’. When this is checked, the power of a ray striking a pixel is interpolated to neighboring pixels depending on where it hits the pixel. If you uncheck that, then the power will only be assigned to the pixel the ray hits. The interpolation is useful when using the detector reading for optimization.


View original
Did this topic help you find an answer to your question?

Nicola Nicassio

Edit to the question: I found how that the problem was due to the default smoothing, which was set to 8. By changing it to None I “almost” solved my problem. However there is a little problem.  When I generate a single ray, I would just the hit pixel to light. However it often happens thay 2 or 4 pixels light together in the 40 x 40 configuration (for “light” I mean that an inchoerent irradiance different from 0 is observed). I also forgot to specify that in my application I’m using the simple ray splitting option (I would need to treat the ray as much “single-photon-like” as possible). Is there a way to visualize only the “actually” hit pixels? (For examples by changing options for some kind of generated noise)


David
Luminary
Forum|alt.badge.img+4
  • Luminary
  • April 23, 2022

Hi Nicola,

In the Object Properties for the Detector Rectangle there is a check box labeled ‘Use Pixel Interpolation’. When this is checked, the power of a ray striking a pixel is interpolated to neighboring pixels depending on where it hits the pixel. If you uncheck that, then the power will only be assigned to the pixel the ray hits. The interpolation is useful when using the detector reading for optimization.


Nicola Nicassio

It works, thanks a lot, 


Reply


Cookie policy

We use cookies to enhance and personalize your experience. If you accept you agree to our full cookie policy. Learn more about our cookies.

 
Cookie settings