Hi John,
Currently if you use the Tolerance Wizard to set up element tilt for a doublet, the whole doublet will tilt together pivoting its front surface vertex by default. You can insert another surface between the front and back elements of the doublet. This way when using the Tolerance Wizard to set up element tilt, OpticStudio will separate the front and back of the doublet as two elements and tilt them separately. However, in this case, the individual tilt will still be pivoting around the front vertex of each element. This is because by default the element tilt is always about the front vertex of the element in OpticStudio.
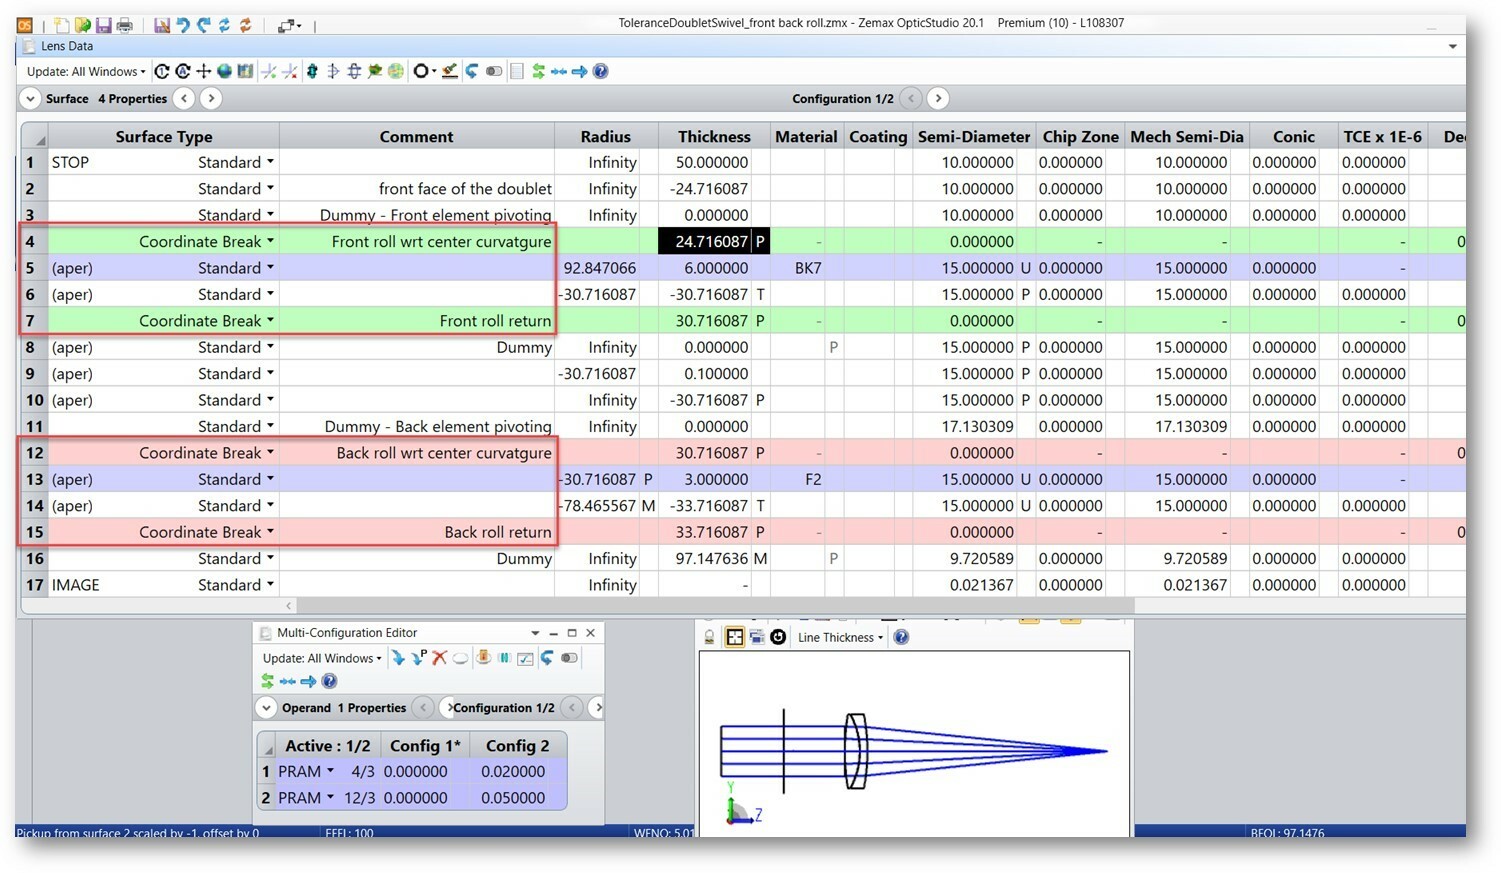
If you want to apply the doublet 'roll' motion, to allow roll/swivel of one element with respect to the other element so the pivoting point of the tilt is along the optical axis and at the center of curvature of the interface between the front and back elements, you'll need to manually put in the Coordinate break surfaces at the proper pivoting positon to accomplish it. In this case, the general procedure would be to use a dummy surface with a negative thickness to place the first CB at the pivoting point which is the center of curvature of the interface between the front and the back elements in the Doublet. After tilting, you assign a positive thickness on the CB to travel back to where the lens surface is to place the element, and then you need to come back to the same pivoting point to untilt and so on so forth. The Lens Data Editor will appear something as below:
 I’ve attached a dummy file here for your reference. Hope this helps.
Hui


 I’ve attached a dummy file here for your reference. Hope this helps.
