In addition, I wanted to comment on one of the questions that came up during the talk, which was: How do we tilt a prism about an arbitrary point in Sequential Mode?
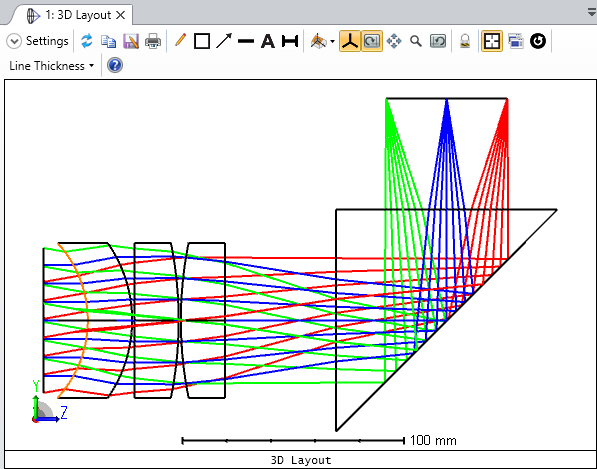
There are many ways to model prism geometries in Sequential Mode -- some ways mentioned in the talk was using Coordinate Break surfaces or using a Mixed Mode setup to have a non-sequential prism object working in Sequential Mode. We have several sample files showing these setups in the Zemax folder at 'C:\ ... \Zemax\Samples\Sequential\Tilted systems & prisms'. The one I decided to work with was the file called 'Prism using total internal reflection.zmx':
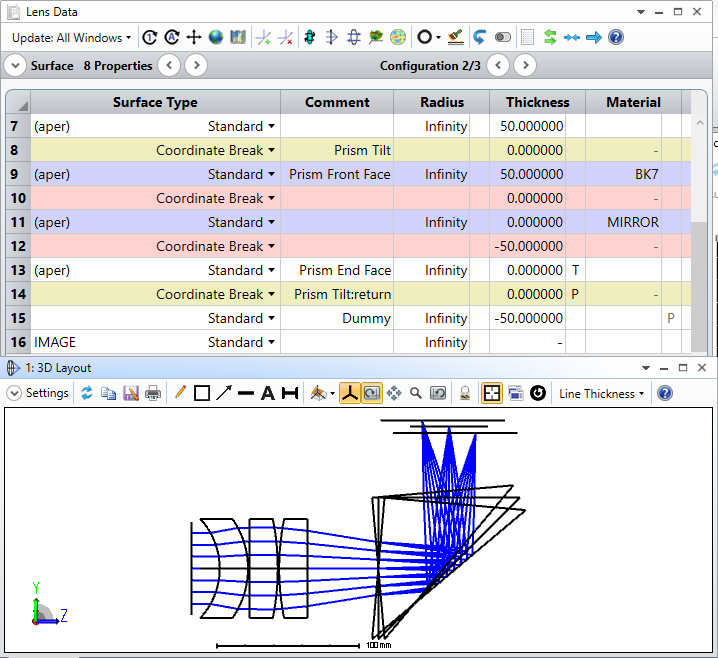
This setup is tricky because the coordinate system that we are starting in before we enter the prism geometry and the coordinate system we end in after leaving the prism are different. One first step we could take is to use the Tilt/Decenter tool to select our surface range encompassing the prism, but due to this change in coordinate systems before and after the prism, the distance from the prism to the image plane won't be preserved:
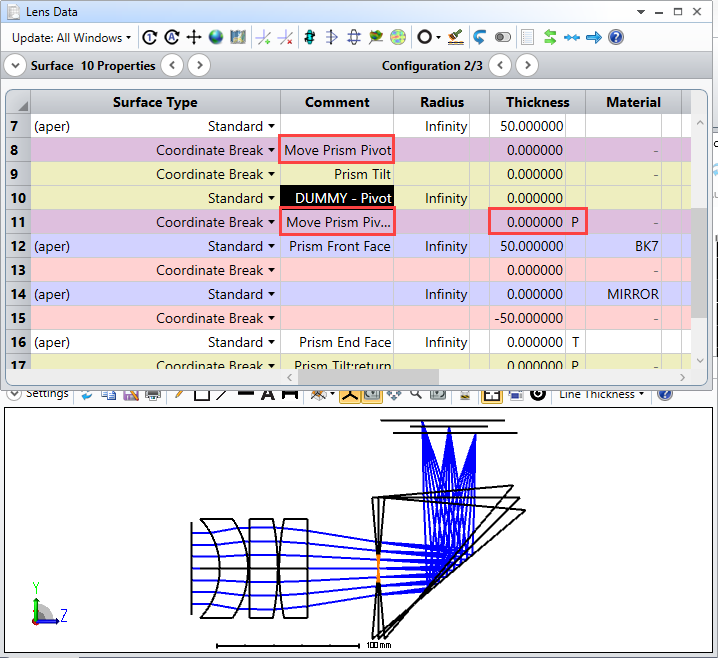
The other note to make is that, again, since the Tilt/Decenter tool pivots about the first surface vertex of the selected range, the prism currently is only able to tilt about the 'Prism Front Face' vertex. To start making this pivot arbitrary, we can use Tilt/Decenter tool to modify the placement of just the 'Prism Tilt' surface, since this will become the pivot point for the scan motion of the prism (like in the slides, I also add in a Dummy surface after and co-located with 'Prism Tilt', and I make the returning Coordinate Break surface in this action also have a Pickup solve to undo the thickness of 'Move Prism Pivot':
Now, the pivot point can be adjusted, but of course, we still have some work to do after the prism geometry has finished being created:
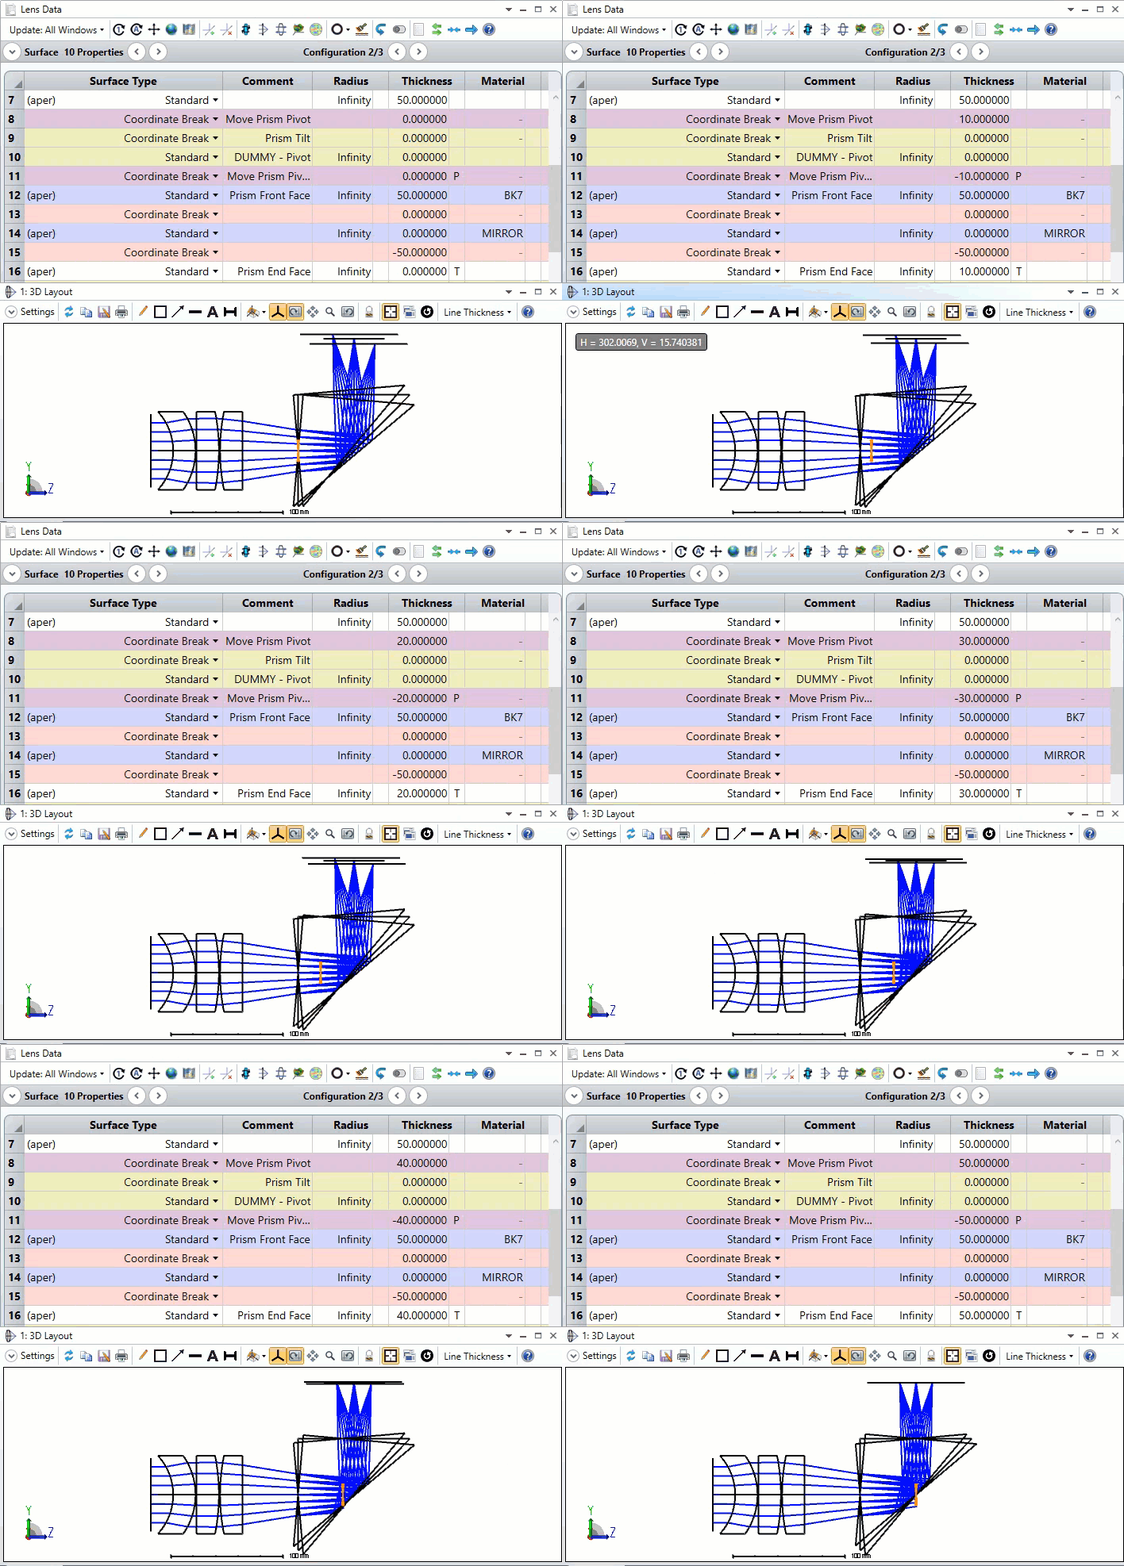
The problem is that we are breaking the relationship of all surfaces after the 'Prism End Face' to where the end face was placed before any tilting. To fix this, we need to set up our Coordinate Breaks after the 'Prism End Face' surface such that we always arrive at the nominal placement of Prism End Face. I think there are many ways to accomplish this, but the way I took for now was:
1. Remove the thickness solve on Surface 16 so that it remains fixed at 0mm
2. Modify Surface 17 so that it now has a Coordinate Return solve to bring us to the same position and orientation as Surface 8, the nominal placement of the Prism Front Face surface
3. Insert a new surface after Surface 17, make it a Coordinate Break, and define its parameters such that it is at the same position and orientation of the nominal placement of the Prism End Face surface

The last step is important, because we'll have to match not just the XYZ location of the Prism End Face nominal point, but it also needs to have it's axes adjusted because we have been folded by the reflection imparted by Surface 14. One way to check that these surfaces have the same position and orientation is with the Merit Function Editor and the GLCX/Y/Z and GLCA/B/C operands (giving us global position and direction cosines, respectively).
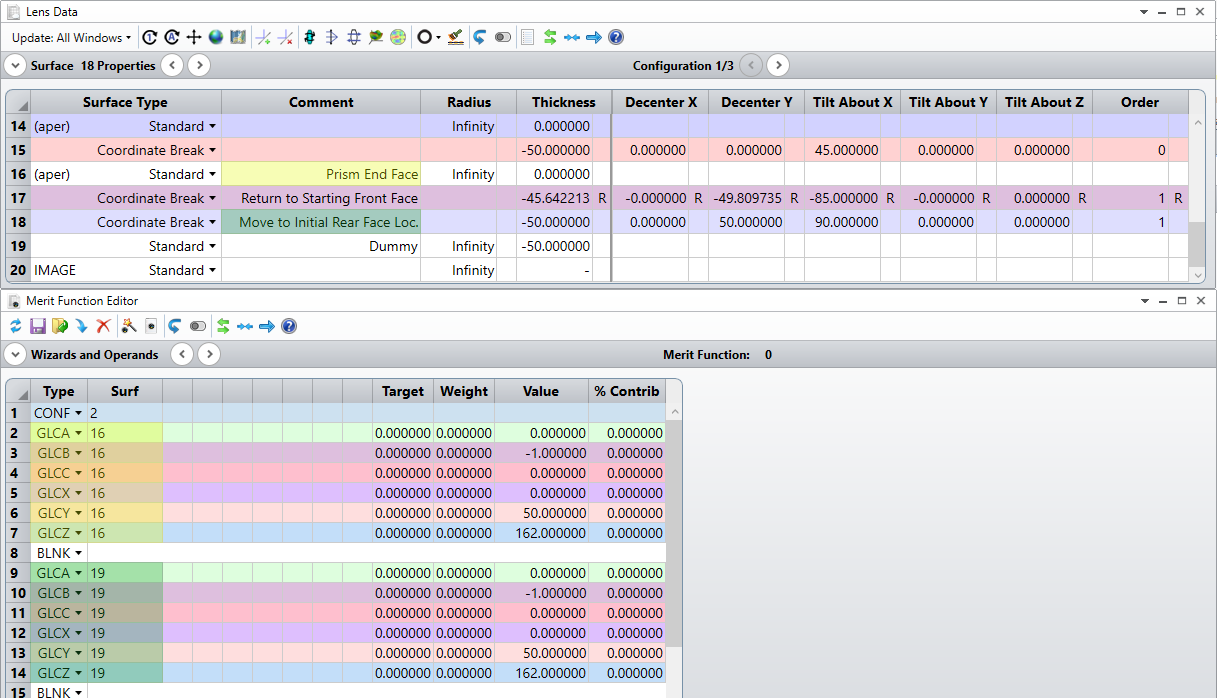
Now, the scan motion of the scanning prism is independent of the surfaces following the prism, and the pivot can be placed independently as well:
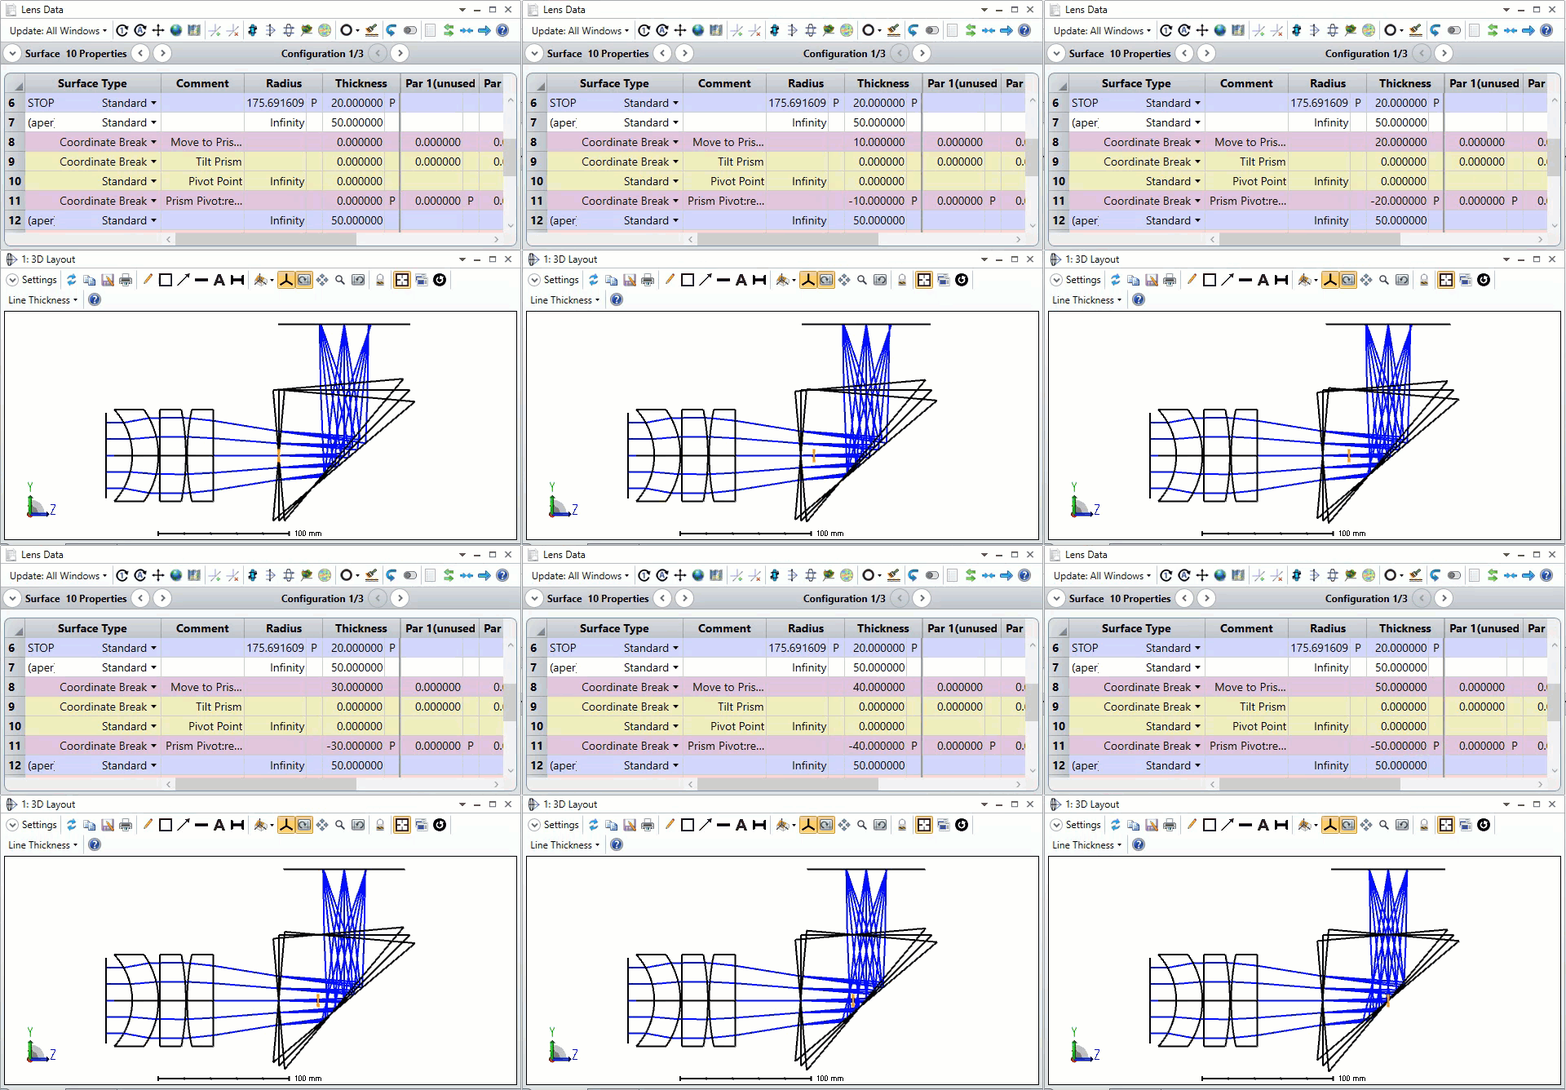
So, we can really see the how important it is to understand where our surfaces are being defined in Sequential Mode. Because the placement of surfaces depends on the parameters of the surface before it (such as the Thickness of any surface being used, or the Tilt/Decenter parameters of a Coordinate Break), it can be a bit tough to understand the global placements and orientations of any given surface. That said, there are ways to get at this data (merit function operands, the Prescription Data report, etc). Other ways of checking this data are also explored in the articles that Thomas shared previously, so I'd definitely encourage that as some further reading if you haven't gone through them already!
Please feel free to add onto this thread if there are any more questions or if there are additional thoughts/approaches on this setup. I'd be interested to hear other perspectives and techniques that other folks might have developed!
~ Angel


