Hi,


I am using two radial sources and one polar detector. I would like to export the data on the polar detector as IES/LDT.

I’ve done this successfully with a source volume, but with a radial source it does not work. It tells me an error message saying that there is no photometric data found on the detector. When I look at the detector it shows data.

What am I doing wrong or not understanding?


Thanks

Hi Thor,


The IESNA and EULUMDAT files use photometric data (either Lumens or Candela) so the IES/LDT Export tool can not be used outside of the visible light range. (Since you are using Watts, the detector is actually recording 0 lumens and that's why it triggers this error).
 
What you can do instead is save the rays on your detector as a .SDF file as explained here: How to export ray trace results in IES format – Knowledgebase (zemax.com) (Generate a .SDF file) 
 
Basically, you need to run a ray trace and save the rays. In the name of the saved file, the first number is the number of the object where you rays will be saved. In your file the detector polar is the object 2. But if your detector polar is object 10 then it will be “10-test.sdf”. The extension is SDF. This is  spectral file, it contains all the information about your rays. It is the most complete description of your source.


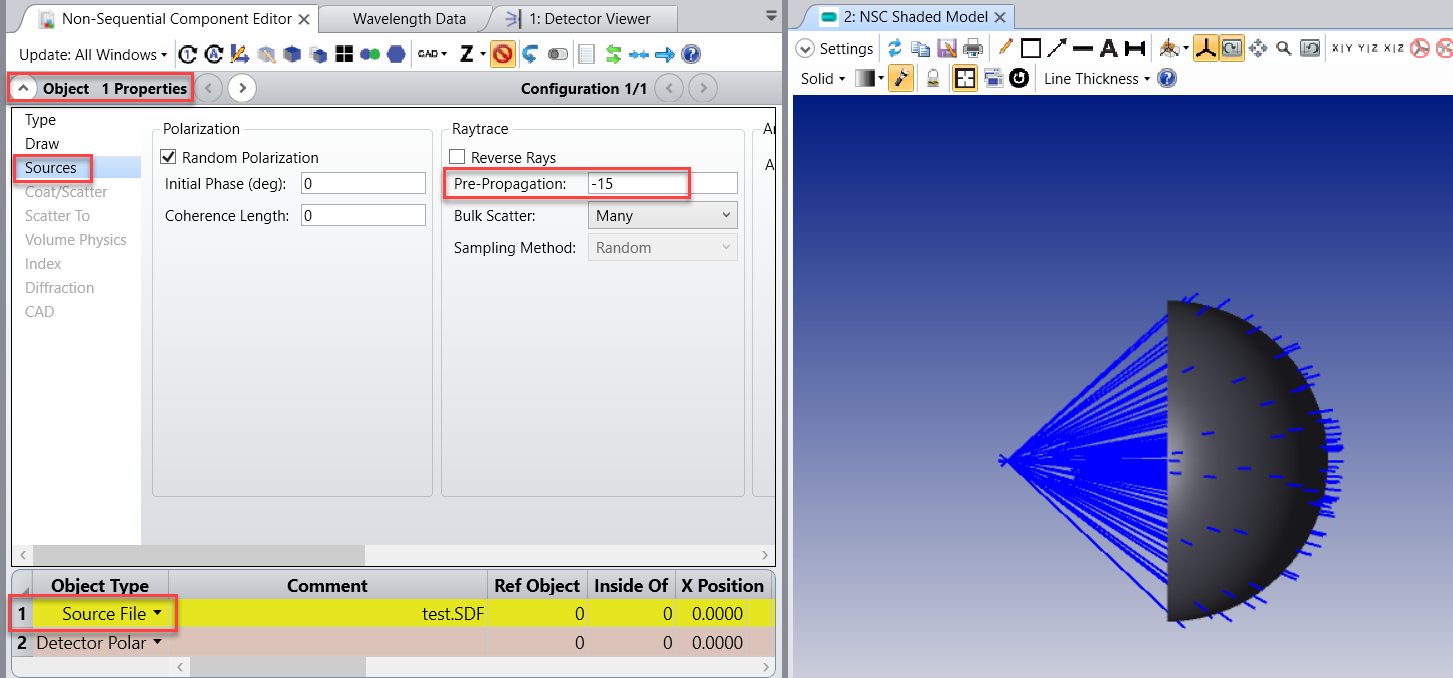
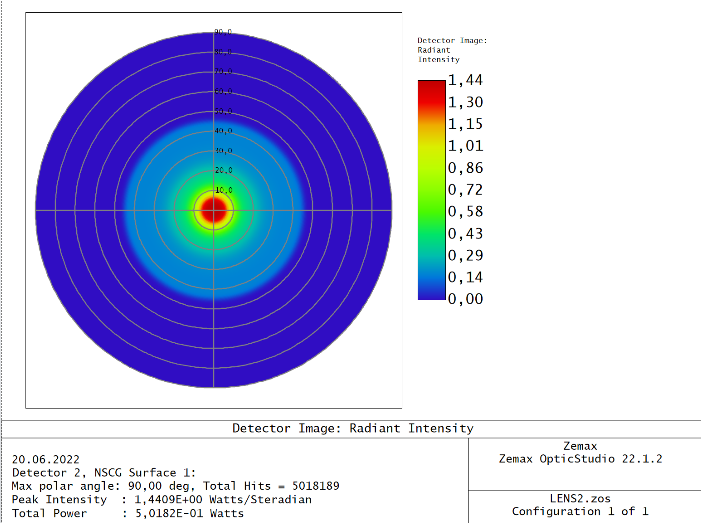
Once you have saved your rays you can import it back in OpticStudio using Source File Object. The rays will be only on the object where you saved it. So you might need to use an option called “Pre propagation” in order to move the starting point of the ray from the surface of the object:


?name=image.png


Hi Thor,


The IESNA and EULUMDAT files use photometric data (either Lumens or Candela) so the IES/LDT Export tool can not be used outside of the visible light range. (Since you are using Watts, the detector is actually recording 0 lumens and that's why it triggers this error).
 
What you can do instead is save the rays on your detector as a .SDF file as explained here: How to export ray trace results in IES format – Knowledgebase (zemax.com) (Generate a .SDF file) 
 
Basically, you need to run a ray trace and save the rays. In the name of the saved file, the first number is the number of the object where you rays will be saved. In your file the detector polar is the object 2. But if your detector polar is object 10 then it will be “10-test.sdf”. The extension is SDF. This is  spectral file, it contains all the information about your rays. It is the most complete description of your source.


Once you have saved your rays you can import it back in OpticStudio using Source File Object. The rays will be only on the object where you saved it. So you might need to use an option called “Pre propagation” in order to move the starting point of the ray from the surface of the object:


?name=image.png

Hi Berta

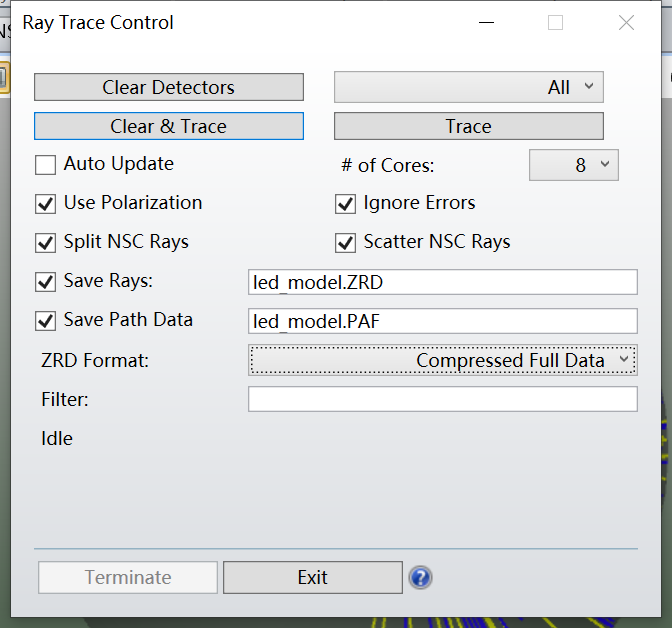
When I save ray data, I find that only ". ZRD file" can be saved. How to save ". SDF file"?


Hi Jin,

To save a ray file, you have replace the ZRD filename by one with .dat or .sdf extension but with prefixed with the detector number. So in you case, the detector seems to by object # 2, and you should type:

2-LED_model.sdf

in the text box. 

Best regards


Reply