How to set / reset cutting plane in NSC Shaded Model

  • 3 September 2019
  • 7 replies
  • 96 views

Badge
I have enabled (pressing Y|Z button) and then moved (with a mouse) the cutting plane in my model view. Now I'd like it back at (0, 0, 0). Is there any way to do that? Ideally I'd also like to be able to move it to a needed location. Cannot imagine it can only be controlled with a mouse.

7 replies

Userlevel 5
Badge +1
Hi Kotya!


Thanks for your post here. Currently, for an already-open Shaded Model window, there is no way to reset your cutting plane location or orientation without using the mouse controls. What you'll have to do as a workaround is to open a new Shaded Model window or "Clone" your window when no cutting planes are selected.


However, this is a request we have heard from other users before, so I would be happy to add a vote under your name for including this functionality. I should note that these feature requests are not a guarantee that it will be added to a future release. These requests are weighed based on impact to our users, difficulty to implement, and the number of users who request it. Still, we truly appreciate your input here as it really does help direct the future of OpticStudio!


Please don't hesitate to follow up here if you have any more questions on this, and thanks again for your time!
Badge
Hi Angel, thanks for the feedback. Is there any way to see the request with votes attached to it? It would be really more helpful than asking the same thing again and again. It would also help see the evolution of ZOS.
Userlevel 2
Badge +1
Hi Kotya, 


Good question. Currently, we don't have feature requests available to the public, but this is actually something that I've discussed with our Product Management Team. With the new MyZemax platform, we have a long list of things that we'd like to implement to give customers better access to resources and knowledge of what's going on at Zemax. I personally think that creating a sub-platform where customers can log feature requests and vote on them would be a great way for us to see what's important to customers. We're not yet to the point where we've really dug into this, but this may happen in the coming months. I will make sure to keep you updated if this is something that we move to implement.


Thanks, and let us know if you have any other questions here!
Badge

Hello, any news on this feature? I am testing 20.3.2, and the detailed testing requires that I do the cut by the plane exactly next to the meridional (yz) plane. So I'd like to have a yz cutting plane off-set by e.g. 0.001 mm. 

Userlevel 5
Badge +1

Hi Kotya,


Thanks for your follow-up post here! At this time, we don't have anything new to announce on this feature.


Regarding your specific question here, what kind of testing are you doing? Is there a reason why this testing needs to be done inside of a 3D Shaded Model viewer? Are you looking to see how a fan of rays travel through a slightly off-set plane that is parallel to the YZ plane? Perhaps having a bit more detailed understanding of what you're trying to accomplish could help us make some other recommendations.


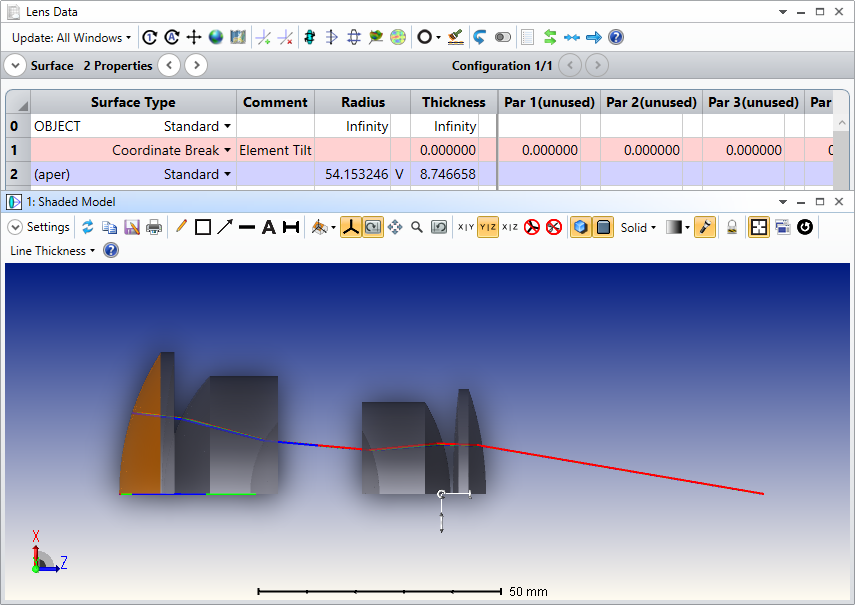
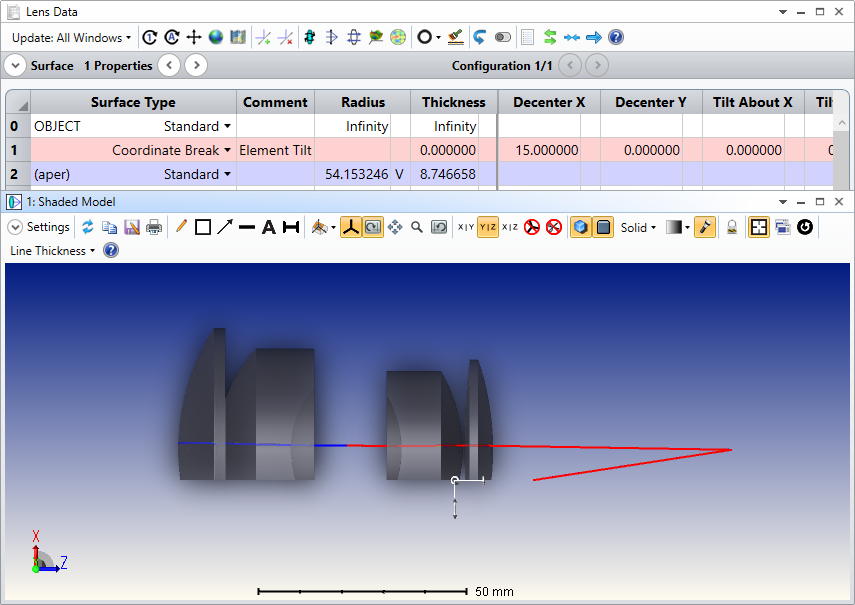
If it absolutely needs to be done in the Shaded Model, one idea I can think of is to use the Tilt/Decenter Elements tool, and intentionally 'decenter' the entire lens system (between the Object and Image surfaces). Then, when you apply the cutting plane initially, it will be placed at the YZ plane. Any decentering of the lens system along the X-axis will therefore cut it at a 'different' YZ plane, equal in off-set to your decentering in the Coordinate Break surface:


Would an approach like this work out for you? Let us know either way, and we can dig deeper if need be!


~ Angel

Badge

Hi Angel,


> At this time, we don't have anything new to announce on this feature.


It's really a pity. Also no plans on making feature requests public?


As for the solution, I am doing more or less what you suggested. Only in my case I had first to rotate the ray into the YZ plane (I was lucky that the system had the rotation symmetry), by first exporting it into Matlab via ZRD, then calculating the new numbers in Matlab, then setting up a new ray in ZOS. It's really annoying, since all it takes to implement the required functionality is adding a few numerical inputs to the settings dialogue, similar to how we can control the orientation of the view. I wonder how such a simple and obvious feature can take so long to implement.

Userlevel 6
Badge +2

Thank you Kotya! We'll make sure to report this to the product team.

Reply