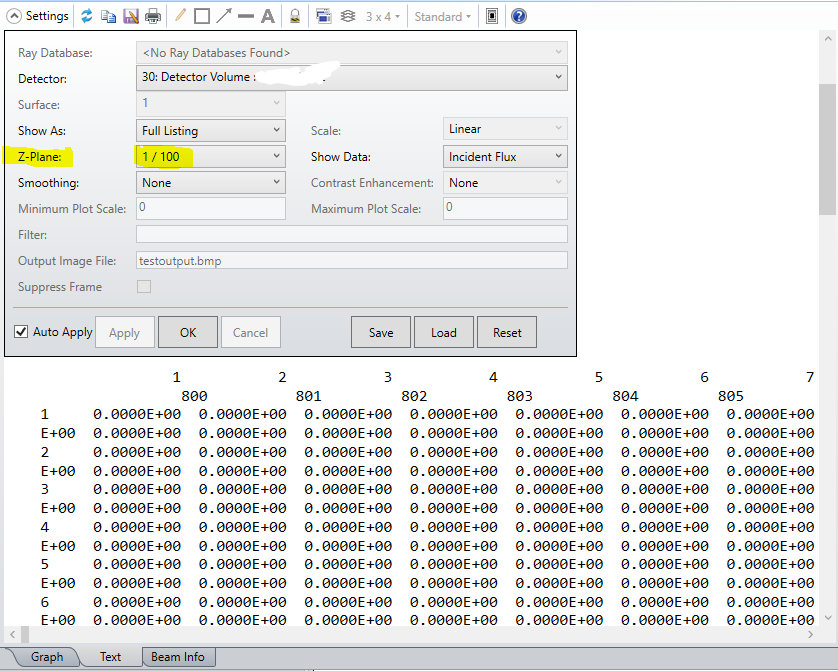
I got a volume detector with 100 x/y-planes in the z direction (#z-pixels). See screenshot below.
When running NSC ray tracing I want to save all of them to individual text files 1;2;3;4;5…. 100
automatically if possible.
Any suggestions of using a macro would be appreciated.
Thank you Klaus
Best answer by David.Nguyen
@klaus
This should do what you want:
# Detector number detector_object_id = 2
# Number of z-slices number_of_z_slices = NPAR(1, detector_object_id, 6)
# Path to the settings file of the Detector Viewer # can be obtained by pressing Save button in the settings of the Detector Viewer # the settings file is in the same folder as the lens file settings_file$ = "C:\Users\{your_username}\Documents\Zemax\Samples\lens.CFG"
# Change format for $STR() function (zero-padded six digits integer) FORMAT"%#06i"LIT
# Loop over the z-slices FORzz, 1, number_of_z_slices, 1 # Modify setting to use a different z-slice MODIFYSETTINGSsettings_file$, DVW_ZPLANE, zz
# Construct filename with the z-slice index filename$ = "E:\" + $STR(zz) + ".txt"
# Save Detector Viewer as a text file using the modified settings GETTEXTFILEfilename$, "Dvr", settings_file$ NEXT
Note that you will need to update the path to the Detector Viewer settings file (*.CFG). To create this file in the first place, you must open the settings of a Detector Viewer and press the Save button in the bottom-right corner.
This will create a file in the same folder of your lens, with the same file name and the .CFG extension. The rest of the code should be self-explanatory. Please let me know otherwise.
PS: I am assuming a raytrace was run a this point, otherwise, you need to perform a raytrace as well before getting the detector data.
@David.Nguyen one small problem how do I get it to save the 2D slice (false color images as data) - the code I got only saves the 1D data and it is the first detector data I think.
I attached the zmx file
# Detector number detector_object_id = 5
# Number of z-slices number_of_z_slices = NPAR(1, detector_object_id, 6)
# Path to the settings file of the Detector Viewer # can be obtained by pressing Save button in the settings of the Detector Viewer # the settings file is in the same folder as the lens file settings_file$ = "C:\Users\kos\Desktop\Innoslab plan\PUMP 793nm\AMP1\pumpe\LaserDiodeTEST.CFG"
# Change format for $STR() function (zero-padded six digits integer) FORMAT "%#06i" LIT
# Loop over the z-slices PRINT "LOOPING" FOR zz, 1, number_of_z_slices, 1 # Modify setting to use a different z-slice MODIFYSETTINGS settings_file$, DVW_ZPLANE, zz PRINT "All done - ok1" # Construct filename with the z-slice index filename$ = "C:\Users\kos\Desktop\Innoslab plan\PUMP 793nm\AMP1\pumpe\slices\" + $STR(zz) + ".txt" PRINT "All done - ok2" # Save Detector Viewer as a text file using the modified settings GETTEXTFILE filename$, "Dvr", settings_file$ NEXT
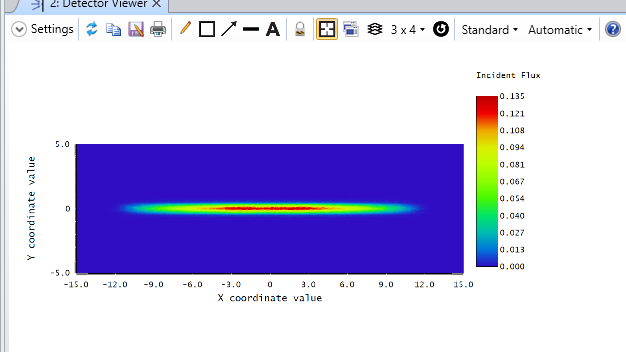
This is the image of the detector with 10 slices however it only saves the y data and slices x in 10 slices (I attached the 4th slices as an example). I want the xy data saved for 10 slices in z.
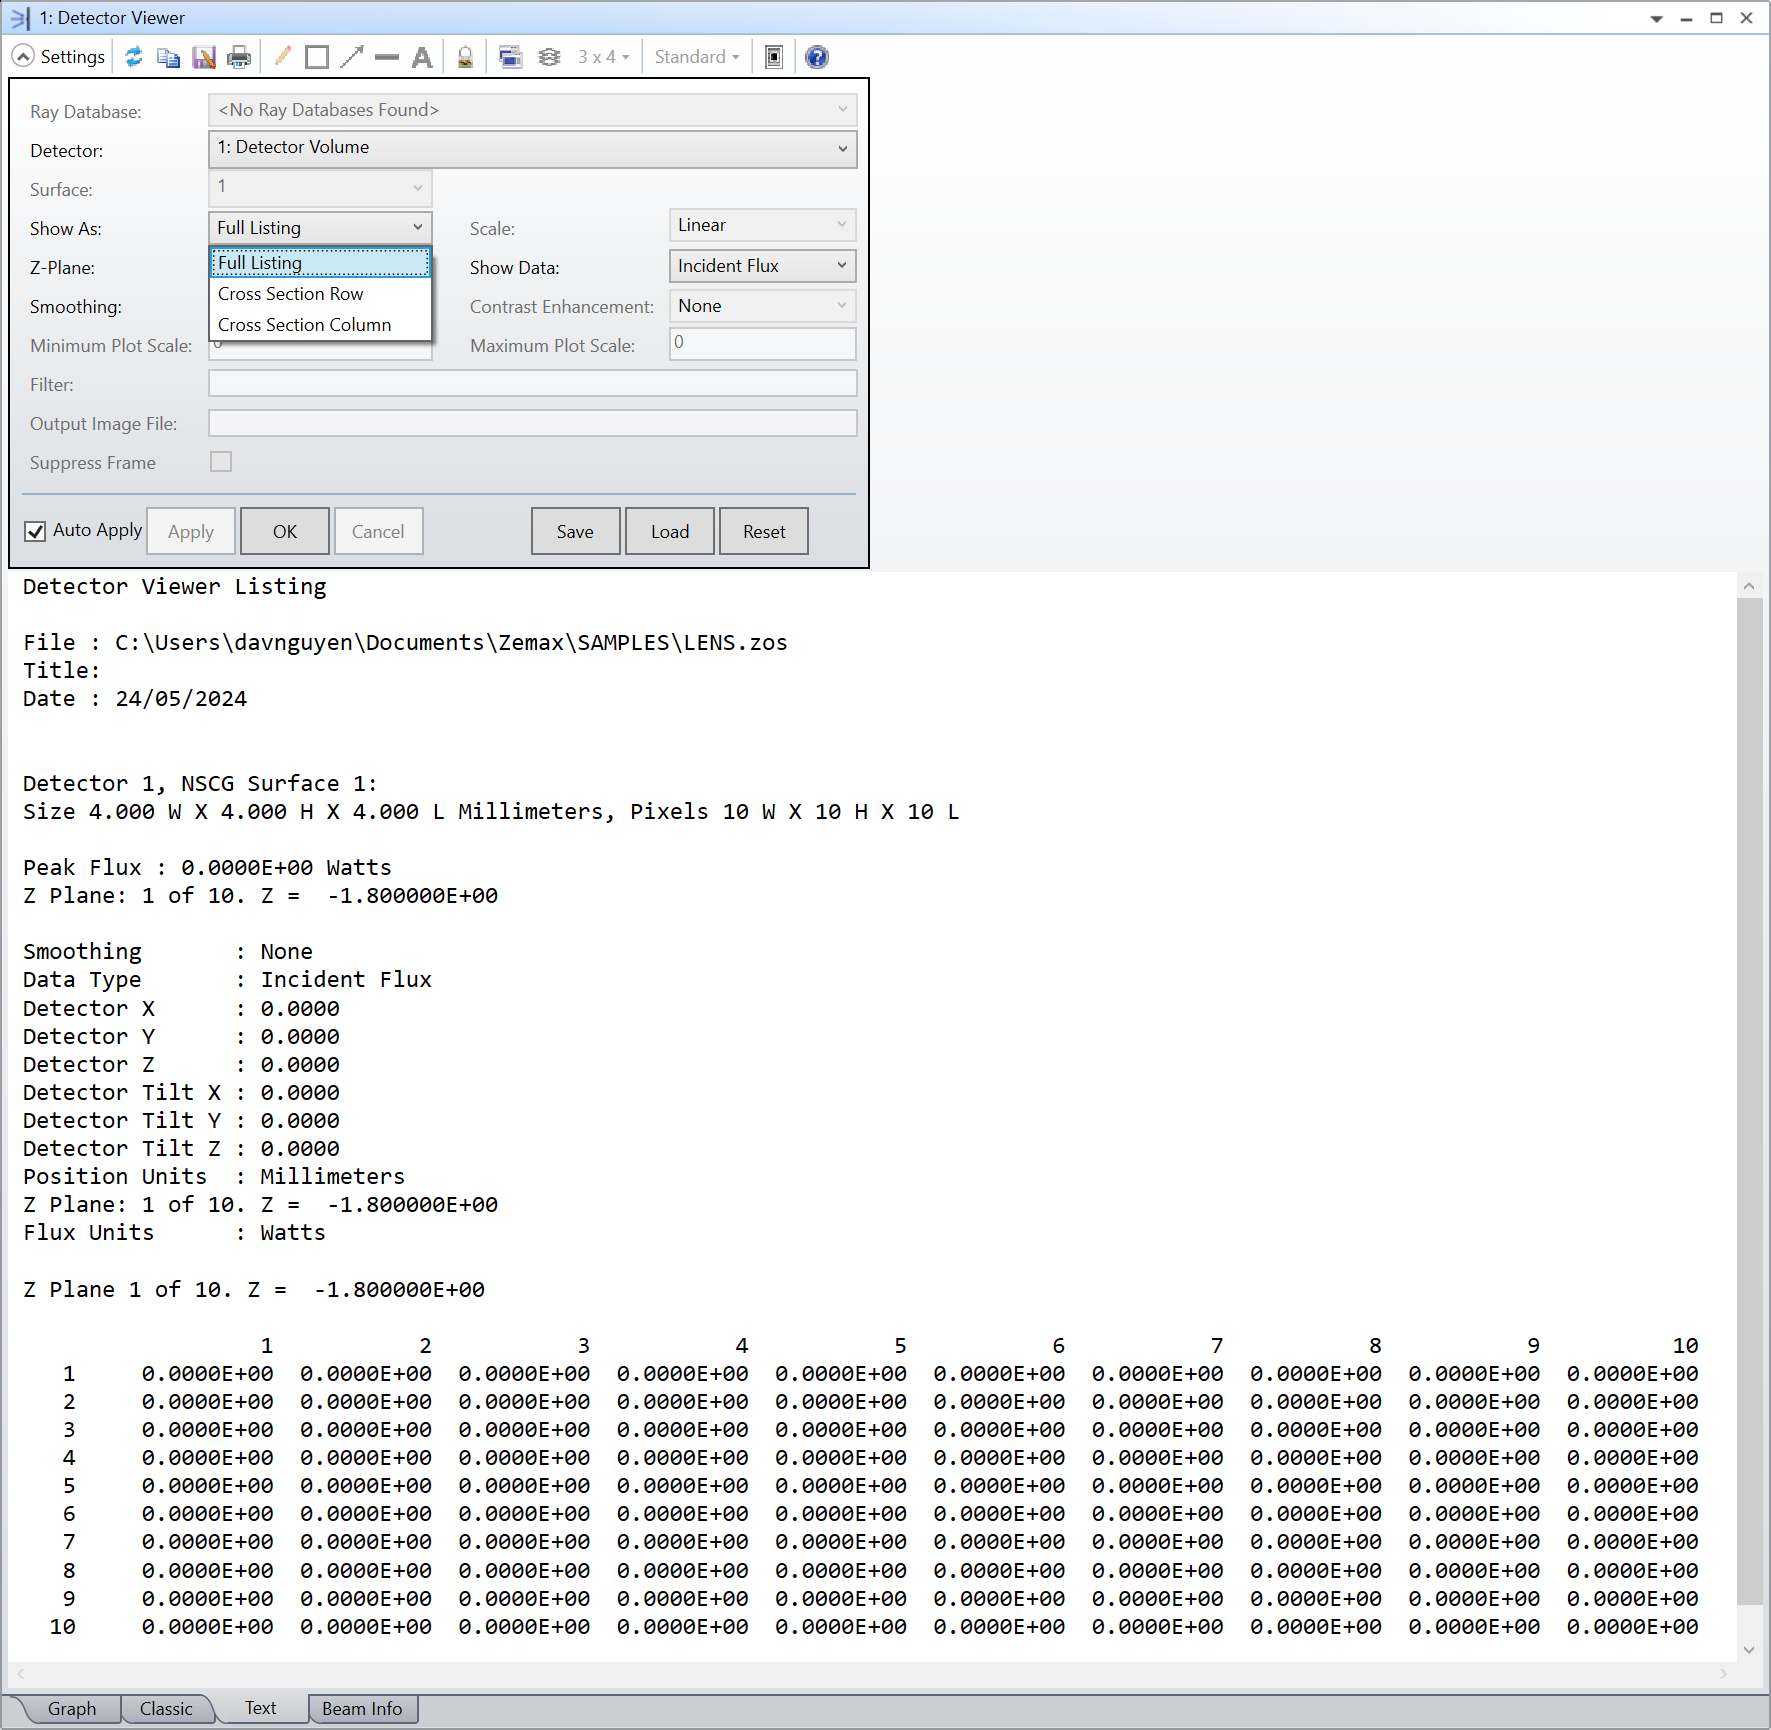
In the Detector Viewer, there’s a setting called Show As. If you are in the Text tab, the options for this settings are:
Full Listing
Cross Section Row
Cross Section Column
See my screenshot below.
Only the Full Listing will give you the 2D data. If you created the CFG file with Show As Cross Section Row/Column, then it will of course try to save the 1D data as a cross-section. My original code is assuming you saved the CFG file with Show As Full Listing. You can either save the CFG file again with the correct setting, or you can make the modification in the code by adding the corresponding MODIFYSETTINGS call:
...
# Change format for $STR() function (zero-padded six digits integer) FORMAT"%#06i"LIT
# Make sure Detector Viewer is Show As Full Listing MODIFYSETTINGSsettings_file$, DVW_SHOW, 0
…
Since you only need to change this setting once, I’d do it outside the loop.