Topic: Selecting a laser propagation method in OpticStudio

Live solution reveal and Q&A: July 20th, 8am - 9am PDT (See the attachments for a calendar invite)

Engineer: @Angel Morales ​- Senior Application Engineer at Ansys Zemax


Ask an Engineer is LIVE again this month! Try out the challenge below to learn more modelling laser beams in OpticStudio, then come back on July 20th to discuss. Submit your solution or questions as a reply to this thread. 


Challenge opens: July 7th

Submit your file as a reply by: July 19th, EOD

Live event: July 20th 8am PST (the calendar invite is in the attachments)

Challenge: 

OpticStudio supports several different approaches to model a laser input for your system. They include:

  • Defining your geometric ray bundle with the correct aperture apodization and divergence angle
  • Utilizing the Paraxial Gaussian Beam or Skew Gaussian Beam analysis to define and propagate your laser beam
  • Generating and analyze your laser beam using the Physical Optics Propagation analysis

Each approach bears their own benefits and limitations.

For this month’s challenge, participants are asked to define a laser beam in OpticStudio and propagate it through a doublet. The laser beam we will be using is provided in the following product specification: 0.8mW 110V Random, HeNe Laser | Edmund Optics. The doublet is provided as an attachment, and it is a slightly-modified version of our Doublet sample file.

Assume the measured beam diameter from the product specification is exactly at the exit port of the supplied laser. Participants are asked to obtain a beam size value for three different positions of the doublet relative to the exit port:

  • Position 1: Doublet’s first surface vertex co-located with the exit port of the laser
  • Position 2: Doublet’s first surface vertex located 500mm to the right (+Z direction) of the exit port of the laser
  • Position 3: Doublet’s first surface vertex located 70mm to the left (-Z direction) of the exit port of the laser (a bit unphysical, but this is a challenge!)

For each position of the doublet, sample the beam size at an image plane 15mm after the last surface of the doublet. Participants should decide which of the above approaches for modeling laser input are suitable.

Files:

  • A slightly modified version of the default Doublet.ZMX/.ZOS sample file (the only change has been removal of variables and Marginal Ray Angle/Height solves)
  • A calendar invite for July 20th. This will connect you to the Teams meeting where Angel will present his solution and answer questions.

Resources/Tips:

  • There are multiple solutions for this type of system setup. We encourage you to discuss and post your questions in the thread below.
  • Different laser modelling approaches may be required for each position of the doublet. Carefully consider whether the data you’re seeing makes sense.
    • Note: This is an important skill in simulation! Knowing what to expect helps us to avoid errors in the simulation setup.
  • If you need a bit of a push for a starting point, take a look at our Part 1 article for How to model laser beam propagation in OpticStudio. You may find a bit of inspiration…


Questions? Comments? Ready to submit your file? Reply to this thread. Replies may be posted in any supported language (English, Chinese, Japanese). Once the event is concluded, the thread will be closed. 

The Ask an Engineer live event will be limited to discussing this challenge and general questions related to the topic. For questions on troubleshooting personal OpticStudio files, please submit a ticket with Zemax Support. In that case, your license support status will be considered. 


Attachments:

Click here to download

テーマ: OpticStudioでのレーザーの伝搬方法の選択
ライブ解説および Q&A 回答日時: 7月20日午前8時~午前9時(米国太平洋標準時)
エンジニア: @Angel Morales  - Ansys-Zemax シニアアプリケーションエンジニア


今月もAsk an Engineerはライブです。以下の課題に挑戦して、OpticStudioでのレーザービームのモデリングを学び、7月20日にディスカッションにお越しください。このスレッドに返信する形で、解決策や質問を投稿してください

課題への挑戦開始日: 7月7日
返事する形でファイル提出期限日: 7月19日
ライブ解説および Q&A 回答日時: 7月20日午前8時~午前9時(米国太平洋標準時)

課題 :  

OpticStudioは、システム用のレーザー入力をモデル化するために、いくつかの異なるアプローチをサポートしています。それらは以下の通りです。

1.正しいアパーチャ、アポダイゼーション、発散角を持つ幾何学的な光線を定義します。
2.e近軸ガウシアン ビーム] (Paraxial Gaussian Beam)または スキュー ガウシアン ビーム] (Skew Gaussian Beam)を使用して、レーザービームを定義し、伝播させます。
3.物理光学伝搬解析を使用してレーザービームを生成し、解析します。
それぞれのアプローチには、利点と限界があります。

今月の課題では、OpticStudio でレーザービームを定義し、ダブレットを通して伝播させることをお願いしています。使用するレーザービームは、以下の製品仕様書に記載されています。0.8mW 110V Random, HeNe Laser|Edmund Optics社製を使用します。ダブレットは添付ファイルとして提供されており、デフォルトのダブレットサンプルファイルを少し修正したものです。

製品仕様書から測定したビーム径が、提供されたレーザの出射口に正確にあると仮定してください。参加者は、出射口に対するダブレットの3つの異なる位置について、ビームサイズの値を得るよう求められます。

  • 位置1:ダブレットの第1面の頂点がレーザーの出射口と同じ位置
  • 位置2:ダブレットの最初の面の頂点はレーザーの出射口から右方向(+Z方向)に500mmの位置
  • 位置3:ダブレットの最初の面の頂点は、レーザーの出射口から左方向(-Z方向)に70mmの位置 (少し非物理的ですが、これは挑戦です!)

ダブレットの各位置について、ダブレットの最後の面から15mm後像面でビームサイズをサンプリングしてください。参加者は、レーザー入力をモデル化するための上記のアプローチのうち、どれが適切かを決定してください。

ファイル:

  • デフォルトのDoublet.ZMX/.ZOSサンプルファイルを少し修正したもの(唯一の変更は変数とマージナル光線角度/高さのソルブの削除です)
  • 7月20日のライブ解説への招待状。この招待状は、Angelが解決策を発表し、質問に答えるチームミーティングにつなげます。

リソース/ヒント:

  • このタイプのシステム設定には、複数のソリューションがあります。以下のスレッドで議論し、質問を投稿することをお勧めします。
  • ダブレットのそれぞれの位置に対して、異なるレーザーモデリングアプローチが必要な場合があります。設定のデータが意味をなしているかどうか、慎重に検討してください。注:これはシミュレーションを行う上で重要なスキルです 何が起こるかを知ることで、シミュレーションのセットアップでのエラーを避けることができます。
  • もし、背景知識をもっと勉強したい場合、「OpticStudio でビーム伝搬をモデル化する方法: 第 1 部 - ガウス ビーム理論と光線ベースのアプローチ」の記事をご覧ください。何かヒントが見つかるかもしれません。

質問やコメント、ファイルを提出する準備はできましたか?このスレッドに返信してください。返信は、サポートされている言語 (英語、中国語、日本語) で投稿できます。イベント終了後、このスレッドは閉鎖されます。

Ask an Engineer ライブイベントは、この課題への挑戦と一般的な質問に限定されます。個人用 OpticStudio ファイルのトラブルシューティングに関する質問については、Zemax サポートにチケットを提出してください。その場合、お客様のライセンスサポート状況が考慮されます。


询问工程师系列:在OpticStudio中选择激光的传播方法

Live说明和Q&A问答:7月20日, 8am - 9am PDT 时区(请查看附件档的会议邀请)

工程師: @Angel Morales ​-  Ansys Zemax高级应用工程师


又到了线上实时询问工程师的时间。尝试以下挑战了解更多OpticStudio激光光束建模的细节,然后在7月20日参与讨论。请将您的设计或者问题发在这篇贴文下方。

挑战开始时间: 7月7日
提交文件截止时间: 7月19日
直播时间: 7月20日8amPST (附件含日历邀请)

挑战内容: 

OpticStudio支持不同的激光建模方式。它们包括:

  • 使用正确的孔径切趾以及发散角定义几何光线
  • 使用近轴高斯光束或者倾斜高斯光束分析来定义和传播您的激光光束
  • 在物理光学传播中设置并分析您的激光光束

每种方法都有其优势以及限制点。


本月的挑战中,参与者需要在OpticStudio 中定义激光光束并且让其在双胶合透镜系统中传播。激光光束的规格参考以下产品: 0.8mW 110V Random, HeNe Laser | Edmund Optics. 双胶合透镜可以在附件中找到,它由系统自带的双胶合示例文件调整得到。

在此我们假设规格中的测量的光束的尺寸就是在激光的出射端位置。参与者需要获取相对于激光出射端三个不同的位置的光束尺寸:

  • 位置 1: 双胶合的第一个表面的顶点与激光出射端位置重合
  • 位置 2: 双胶合的第一个表面的顶点位于激光出射端位置右侧(+Z方向)500mm处
  • 位置 3: 双胶合的第一个表面的顶点位于激光出射端位置左侧(-Z方向)70mm处(跟实际情况可能不符,但是我们可以尝试一下)

对于各个位置的双胶合,查看双胶合最后一个表面顶点后15mm的平面(该表面作为像面处理)的光束尺寸.参与者需要自行确定这三种位置分别使用以上所述的哪种建模方法比较合适。

附件:

  • 由示例文件Doublet.ZMX/.ZOS 微调得到的文件 (调整包括移除变量以及边缘光线角度/高度求解)
  • 7月20日的会议邀请日历。这可以让您加入Angel展示解决方案并答疑的Teams会议

参考资料/提示:

  • 这一类型的系统有多重解决方法。我们建议您进行尝试,并在评论区留言讨论。
  • 双胶合放置在不同位置可能可以使用不同的建模方法。您可以思考一下对于这些位置而言什么样的建模是有效的。
  • 小技巧:这在仿真中是很重要的技能。知道期望的仿真结果可以帮助我们避免仿真设置中的错误。
  • 如果您需要一点灵感的话,可以参考一下我们的这篇文章 How to model laser beam propagation in OpticStudio. 

 
问题?评论?准备好提交文件了吗?都可回复本帖。技术支持团队会英语,中文和日语,评论可以是以上语言中的任意一种。活动结束的时候,本帖会关闭评论,所以有问题的话可以尽早提出。
本次询问工程师系列现场活动将仅限于讨论此挑战和与该话题相关的常规问题。 有关对个人OpticStudio 档进行故障排除的问题,请向 Zemax 技术支持提交工单。在这种情况下,将考虑您的授权是否在服务期中的问题。


I have been getting same beam waist at all three positions after using GBPS method while i considered 1.7mrad as the full divergence angle. Does that make sense?


Please find the files attached.


Hi Anurag,

Thanks for posting your solution! Interesting -- it’d be great chatting with you about your setup during the event! Will we see you there?

If not, we’ll be sharing our materials afterwards, but hopefully I’ll be speaking with you in a few minutes!


Hi Anurag,

Thanks for posting your solution! Interesting -- it’d be great chatting with you about your setup during the event! Will we see you there?

If not, we’ll be sharing our materials afterwards, but hopefully I’ll be speaking with you in a few minutes!

Apologies sir, could not attend the meet due to another engagements. Will be waiting for the recorded session.


Watch the recording!


The recording from this month’s session is now available above. The files from the discussion are available here: click here to download


Watch the recording!


The recording from this month’s session is now available above. The files from the discussion are available here: click here to download

I wish i could attend but just now watched the session and really thankful for such a brief explanation. I just found the mistake i was doing by considering half beam divergece angle instead of full 1.7 mrad and secondlly, the object NA approach is quite handy to save a lot of time to quiclky adjust initial set-up. 

Also thanks to participants questions about apodizing for super gaussians, laser to fiber coupling problem and final conclusioon that comes up with the possibility of defining the POP MF or ZBFSUM for multimode LASER beams.


Hey Anurag,

I hope you had a nice weekend! I just wanted to touch base on this thread again regarding your solution. As you’ll see in the video, we didn’t get exactly the same result you got -- we found different beam sizes 15mm after the doublet when put the doublet in different positions. In the attached PDF, I put down a summary of the different beam sizes and a comparison of the estimation from just geometric ray tracing versus the Gaussian Paraxial Beam tool. We also showed the agreement of results between the two calculations, and we provided the number of  “Rayleigh ranges” between the beam waist and first vertex of the doublet to illustrate better convergence of values as we go more far-field:

I looked at your solution, and I think perhaps the differences are coming down to how you set up the initial beam sizes. It looks like we arrived at different beam waist values and different positions of the exit port of the laser relative to the waist of the laser. I wonder if part of it had to do with your definition of Wavelength 1 as 0.544 um rather than the 0.6328 um of the laser, but it may also be related to the optimization you performed (I think, based on your provided file).

In any case, I hope the attached materials give some more insight on the approach we took for the session. Let us know if you have any questions on it, and thanks again for sharing your solution!


By the way, I noticed in reviewing the presentation that I made a bit of a typo on Slide 6. I had an incorrect exponent in calculating the beam waist:

The orange highlight should read 10^-7 meters instead. The result remains correct, though -- looks like I just typed the wrong exponent in the one location. I’ve attached an updated copy of the slides with a correction.

Sorry about that, and thanks again to those who attended!


Hey Anurag,

I hope you had a nice weekend! I just wanted to touch base on this thread again regarding your solution. As you’ll see in the video, we didn’t get exactly the same result you got -- we found different beam sizes 15mm after the doublet when put the doublet in different positions. In the attached PDF, I put down a summary of the different beam sizes and a comparison of the estimation from just geometric ray tracing versus the Gaussian Paraxial Beam tool. We also showed the agreement of results between the two calculations, and we provided the number of  “Rayleigh ranges” between the beam waist and first vertex of the doublet to illustrate better convergence of values as we go more far-field:

I looked at your solution, and I think perhaps the differences are coming down to how you set up the initial beam sizes. It looks like we arrived at different beam waist values and different positions of the exit port of the laser relative to the waist of the laser. I wonder if part of it had to do with your definition of Wavelength 1 as 0.544 um rather than the 0.6328 um of the laser, but it may also be related to the optimization you performed (I think, based on your provided file).

In any case, I hope the attached materials give some more insight on the approach we took for the session. Let us know if you have any questions on it, and thanks again for sharing your solution!

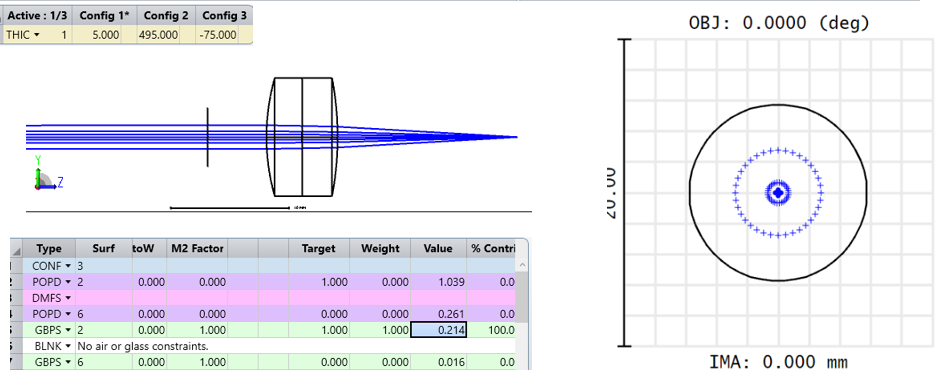
Thanks for the simple explanations sir as how I started approaching the problem by puting a constraint of 15 mm back focal length and observing the optimised beam spot there. I started with optimising for divergence angle (RANG) followed by adding a dummy surface based on minimising GBPS merit function. Once attained the exit port location, then used POP while taking the curvatures of doublet as a variables to get a diffraction limited spot. 

But your approach is like breaking down the problem into piece-wise manner. 


I really thank the opticstudio team and specially SPIE for providing this monthly experience for interns like me.

Hi Anurag,

Thanks for the added details! I see -- I think I should have made my text a bit more clear, then! Yes, what I meant to pose as the challenge was that we were sampling a beam 15mm away from the back face of the doublet. However, I didn’t mean to imply that the beam should be focused at this 15mm position, just that we wanted to track the size of the beam :)

Yes, it was a bit more piece-wise with the approach we took, just starting from defining beam parameters and starting to set up the Lens Data Editor. In any case, thanks for your comments! We’re happy to hear that it’s been useful for you so far -- looking forward to more discussion in the future!


This topic is now closed. Thank you to Angel and all of our attendees for an engaging and educational session :)