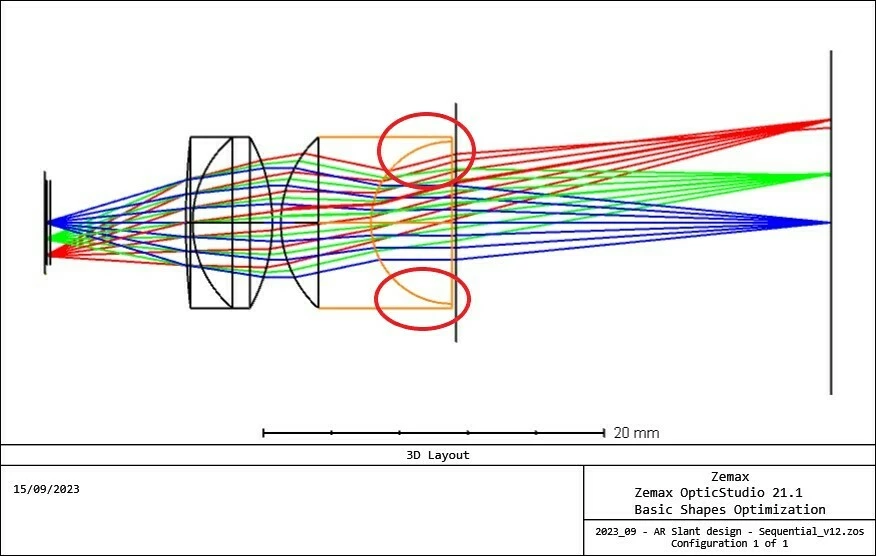
With typical settings, OpticStudio will automatically adjust the lens sizes to do what you are asking. Setting the clear or mechanical semi-diameters to fixed values is what usually causes lens shapes like the one you are seeing.
There are a lot of possible settings that can lead to a graph like the one you’ve attached, but I don’t think there’s enough information here to definitively say which changes you need to make. You can set the SD values to Automatic if you have them fixed. If you have clear SD margins set in the System Explorer, like a 5% applied to all, then you can reset those to zero. Ray Aiming might help if the large curvatures are making it hard to fill the pupil accurately. Increasing the number of rays shown can help sometimes (but I think yours is set high enough to avoid any major gaps on the outside).
I typed the above without seeing your attachment. Since you sent a copy of the system, I can now tell you how to fix this, but I’ll leave my previous statement up for general interest. If you set the clear and mechanical SD to automatic and then remove the surface aperture on surface 7, which is set to 5 and is forcing the lens to open to that width, you can remove the problem region. The mechanical SD will still set itself to five to match the previous surface, but it won’t extend in Z any further than it has to to get the needed clear SD in the region the rays pass.